PowerShell Setup
With newer versions of Windows, PowerShell is installed by default but not likely enabled.
On Windows 10 PowerShell is installed by default, but the execution policy needs to be set to unrestricted which requires lanuching PowerShell in administrative mode.
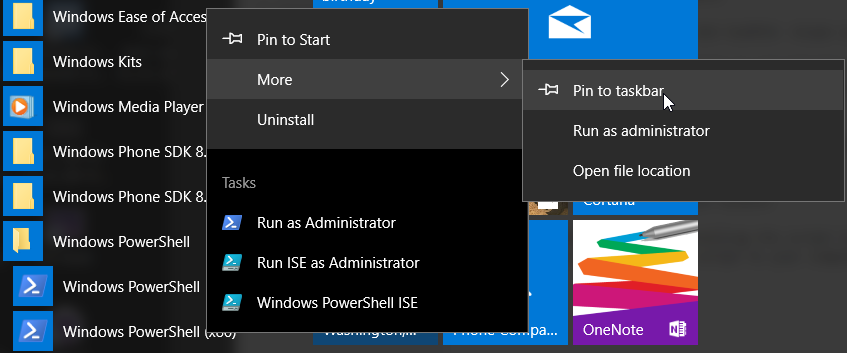
After finding PowerShell in the Windows PowerShell folder in the start menu, select the option 'Pin to taskbar'.
From the TaskBar, right-click on the PowerShell icon and select Run As Administrator.
In the PowerShell console window, enter the following command.
PS> set-executionpolicy -unrestricted
Enter the command 'exit' to quit the console window
There is not any reason to run PowerShell in administrative to complete the remaining setup.
Start the PowerShell again and verify the installed version of PowerShell.
PS> $PSVersionTable
You'll need to running PowerShell version 5 or newer. The module was tested with the following code levels.
PS> $PSVersionTable

Name                           Value
----                           -----
PSVersion                      5.1.15063.413
PSEdition                      Desktop
PSCompatibleVersions           {1.0, 2.0, 3.0, 4.0...}
BuildVersion                   10.0.15063.413
CLRVersion                     4.0.30319.42000
WSManStackVersion              3.0
PSRemotingProtocolVersion      2.3
SerializationVersion           1.1.0.1
Install the Venom module
There are basically two ways to install the Venom module. For those not that familiar with PowerShell or Windows, the easiest is to use the Install-Script command.
PS> Install-Module Venom -Scope currentuser
If the PowerShellGet module is not already installed, there will be a prompt requesting permission to install the module. A selection of 'Yes' is the right answer.
If the Venom module has already been installed, it can be updated to the latest version by entering the command:
PS> Update-Module Venom
The other method of installing the script is to use the normal GitHub process of cloning the script to your computer.
Other Modules/Software to Install
Dell/EMC Symmetrix Storage Arrays
For Dell/EMC symmetric storage arrays support, the Solution Enabler product will need to be installed. This product contains the CLI commands used to communication with the storage arrays. Both local and remote symcli commands will work. Using the RESTAPI is the future direction that will be used to communication with Dell/EMC storage arrays.
The Venom module was tested with the following Solution Enalber version.
PS> symcli

Symmetrix Command Line Interface (SYMCLI) Version V8.3.0.6 (Edit Level: 2252)
built with SYMAPI Version V8.3.0.6 (Edit Level: 2252)
PureStorage Arrays
PS> Install-Module PureStoragePowerShellSDK -Scope currentuser
Other SAN devices
Communication with other storage arrays and devices use either the RESTAPI or the SSH protocol for communications.
PS> Install-Module Posh-SSH -Scope currentuser
Module Versions
The following module versions where used in testing the Venom module.
PS> Get-Module
| ModuleType | Version | Name | ExportedCommands |
|---|---|---|---|
| Manifest | 1.7.7 | Posh-SSH | {Get-SCPFile, Get-SCPFolder, Get-SFTPFile, New-SFTPSession...} |
| Binary | 1.7.4.0 | PureStoragePowerShellSDK | {Add-PfaHostGroupsToProtectionGroup, Add-PfaHostIqns...} |
| Script | 0.2.0 | Venom | {Get-VeArrayInfo, Get-VeSymmMetrics, Update-VeArrayInfo} |